EggRider displays setupLink
Please carefully follow the instructions below for a successful setup.
Install display on your handlebarLink
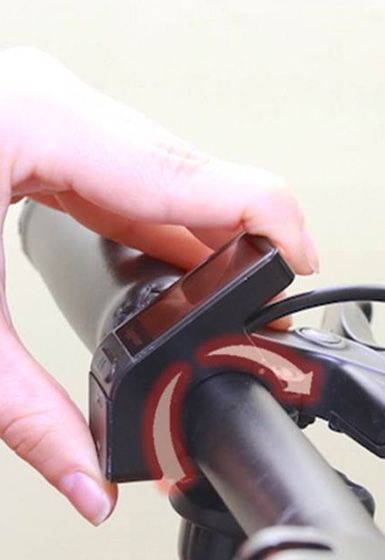
Find the spot on the handlebar, open the hinge, make sure no other components are pushing the display.
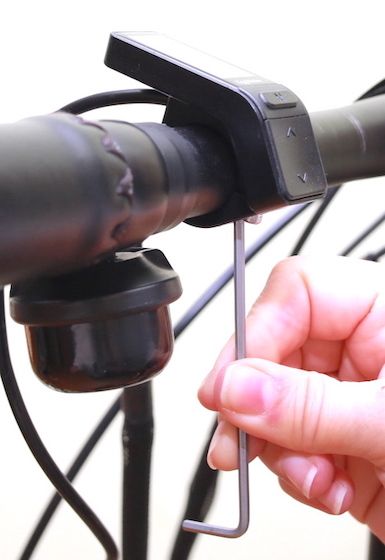
| Measure handlebar | Tighten the screw | Allow slight rotation |
|---|---|---|
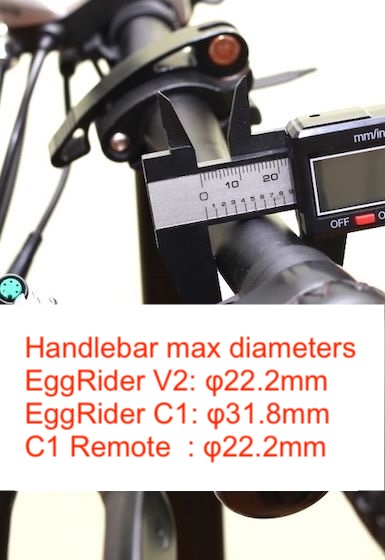 |  |  |
EggRider V2 is designed for handlebars with a diameter of 22.2mm, and it should be mounted on a straight section of the handlebar.
EggRider C1 display can be adjusted to fit handlebars with diameters of 31.8mm and 22.2mm. It includes a remote designed for a 22.2mm diameter handlebar. Ensure both the display and remote are properly installed on your bike for optimal compatibility.
Warning
Adjust display to a position easy to operate, using M3*10 hex set to screw and tighten. Recommended tightening torque: 0.8 newton-meters. Damage caused by excessive torque is not covered by the warranty.
Plug in the connector to your bikeLink
Ensure that connectors are matched by type.
Make connection only with same type of connectors. If not done so, it voids warranty. 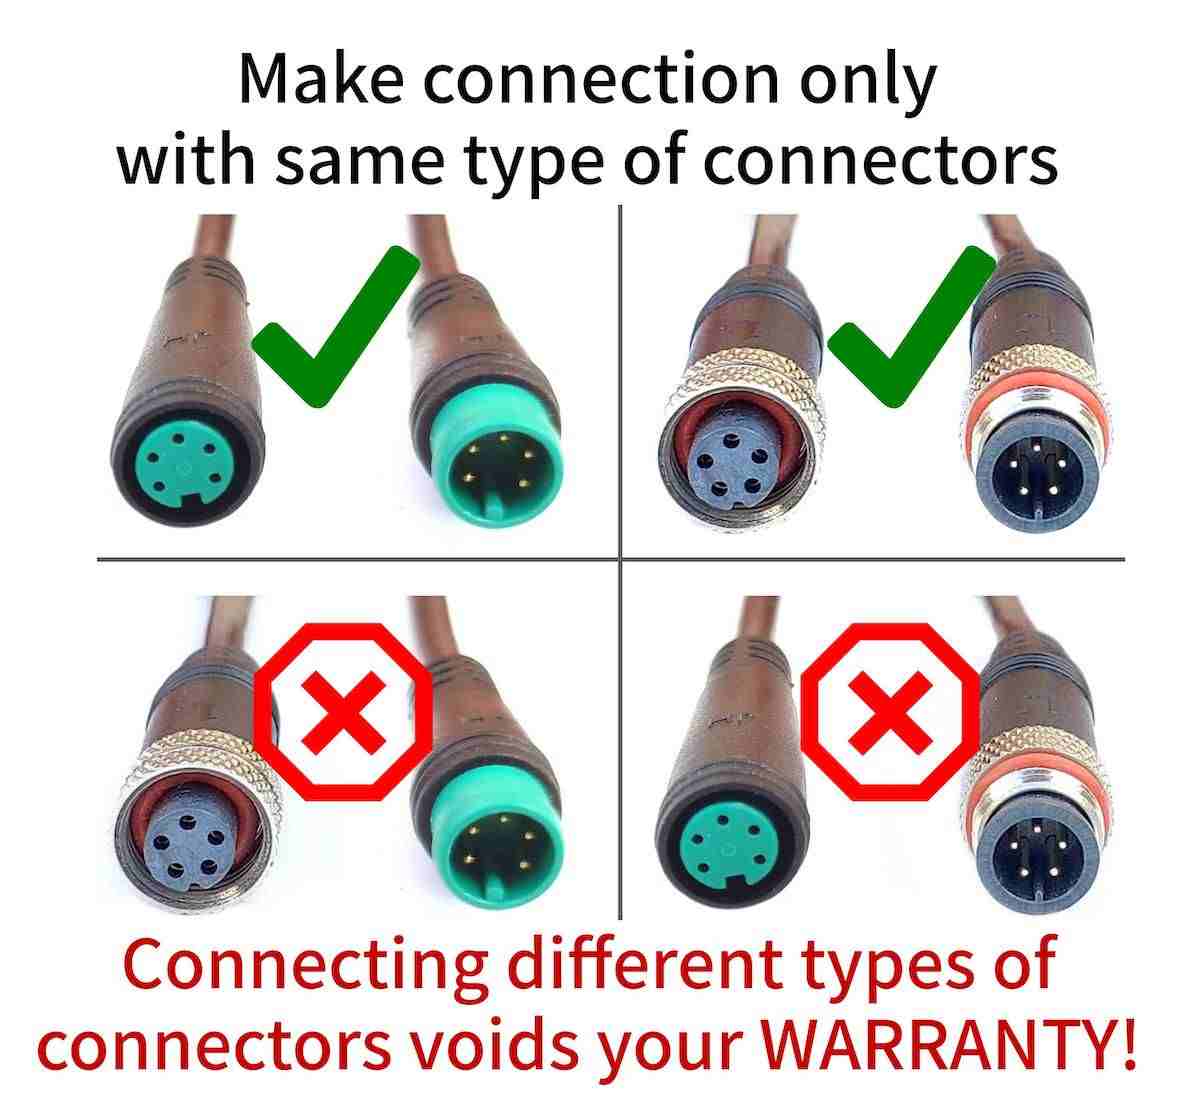
Use only authorized adapters such as female to male and male to female adapters.
Otherwise, there's a high likelihood of damaging the display and controller. 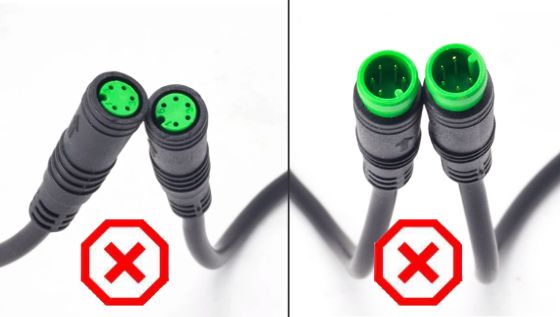
Ensure connectors are gently connected using the connector guide.
Incorrectly applying force or twisting the connectors can result in damage to the connector guide, leading to warranty voidance.
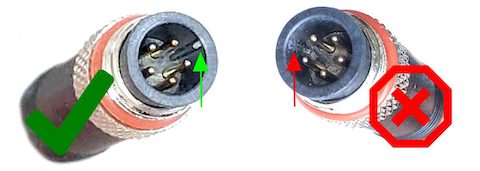
For RadBikes connection guide, please see "Rad settings" or "Radv2 Settings" depending on your bike model.
Protocol detectionLink
When you first connect the display it is important to check that speed shows 00.0 as shown in the picture bellow. This means the EggRider display is able to communicate correctly with your bike. If instead you see speed --.- or error FF (EFF) please follow Protocol not correctly setup in troubleshooting. Once the working protocol is found you should NOT change it from Display Settings page.
| Display Model | Communication OK | Communication NOT OK |
|---|---|---|
| EggRider V2 | 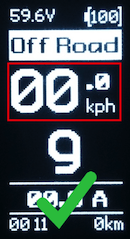 | 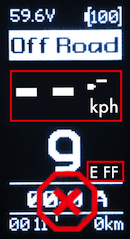 |
| EggRider C1 | 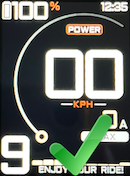 | 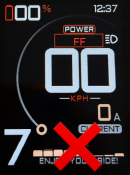 |
Connect with the mobile appLink
| Android | iPhone |
|---|---|
 |  |
Download the mobile app from the store by clicking on one of the images above.
Finding your deviceLink
At startup, an automatic scan for nearby devices is triggered. If the scan finishes and the device does not appear in the list, restart display and pull down on the page to manually trigger a re-scan.
Once the device shows in the list, tap on it to initiate the connection.
Do not pair from the Bluetooth menu. Connect only from the app. (see Connection troubleshooting)
ActivationLink
Tap on the device in the search list. When the popup shows, choose option Activate now.
Inserting correct information gives you instant activation.
The following information is required:
-
Shop name - Insert the shop where you bought EggRider display from. Start typing and chose from the suggestions.
Example:
www.shop.eggrider.comeggrider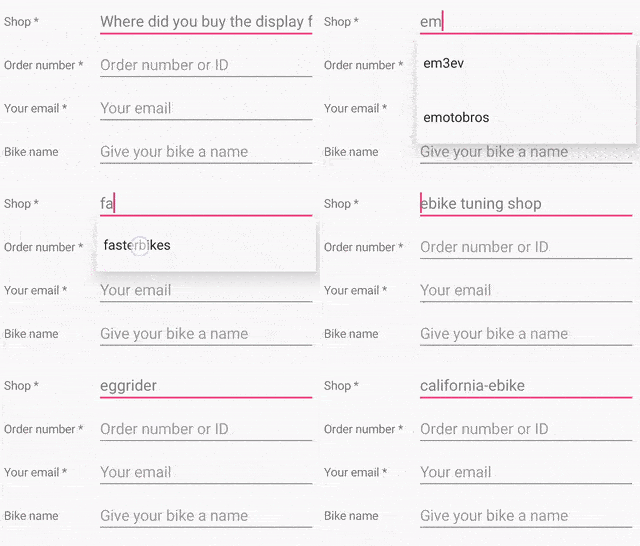
-
Order ID - it is usually a number and you can find it on your order email or invoice. If you bought the EggRider from a reseller, please ask your reseller for activation details.
- Your email
Attention
Inserting wrong information will lead to activation delays.
Important configurationLink
Wheel sizeLink
To calculate the speed we use Wheel circumference (millimeters) value from Display settings page.
You can use the Wheel size drop down helper with some predefined wheel circumferences.
The following links provide comprehensive resources for determining the wheel circumference Wheel size math or Cyclecomputer calibration
Info
The Wheel size drop down is just a helper with predefined values for Wheel circumference. It is normal to go back to Select.

BatteryLink
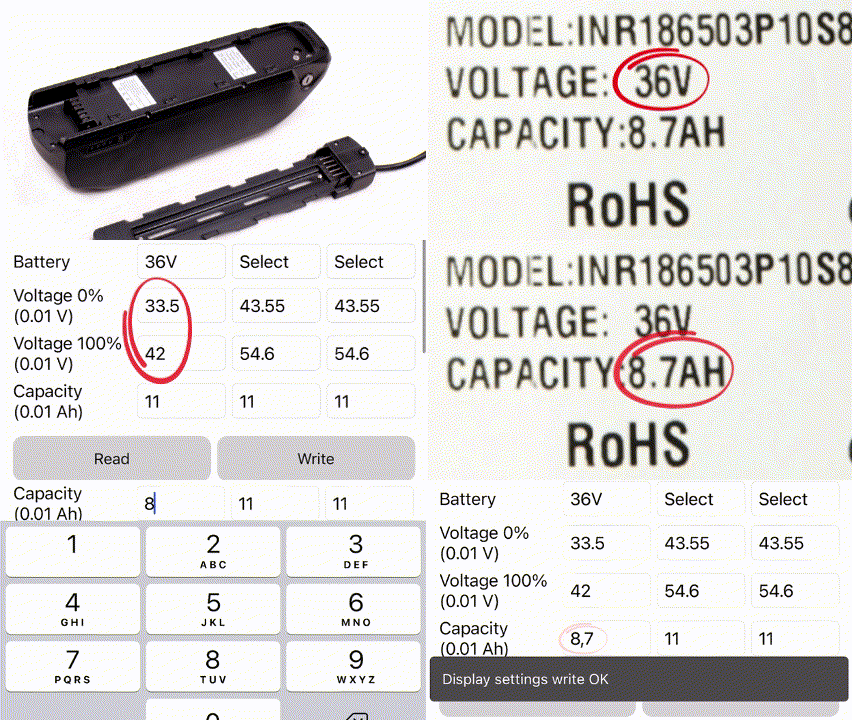
To have a good battery percentage, you have to set the Voltage 0% V, 100% V and capacity (Ah) in the Display settings page.
Use the Battery Voltage drop down helper with predefined values for Voltage 0% and Voltage 100%. You can also manually adjust the values to your specific requirements.
These settings are used for battery measurements only, they don't influence the voltage cutoffs for example. Use the controller specific settings for protection.
Warning
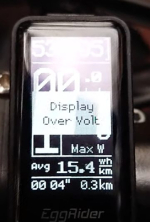
EggRider doesn't work with voltage over 60V (max 52V batteries) or with dual battery systems based on diodes. If you see the Display Over Volt message please Stop using the display and Contact us via email.
Saving settingsLink
Warning
The information on EggRider display it is only saved permanently when the display it is powered off from it's own power button. This also includes the trip data.
Configure e-bike specific settingsLink
One more step before you're set to go!
On specific models you need to configure the e-bike/controller specific settings to have full functionality. Please open the navigation menu and go to E-bike settings group and select the page relative to your e-bike/controller model.
Tip
If you encounter any issues please keep in mind our Troubleshooting page
Tip
At the bottom of each page you can also find Next and Previous buttons to go through the user manual in sequence.